Product Serving : MLflow
MLflow

- 머신러닝 실험, 배포를 쉽게 관리할 수 있는 오픈소스
- 과련 오픈소스 중 제일 빠르게 성장
- CLI, GUI 지원
MLflow의 목적
- 실험의 지속적 추적
- 코드의 재현
- 모델의 패키징과 배포의 용이성
- 모델 관리를 위한 중앙 저장소
MLflow 핵심기능
- Experiment Management & Tracking
- 머신러닝 실험 관리와 실험 내용을 기록할 수 있음
- 추가적으로 하나의 MLflow 서버 위에서 자기 실험을 공유 가능
- Model Registry
- MLFlow로 실행한 머신러닝 모델을 Model Registry에 등록 가능
- Model Serving
- Model Registry에 등록한 모델을 REST API 형태의 서버로 서빙할 수 있음
- Input = model input
- Output = model output
- 직접 도커 이미지를 안 만들어도 생성 가능
MLflow Component
- MLflow Tracking
- 머신러닝 코드 실행, 로깅을 위한 API, UI
- 결과를 local과 server에 기록해 실행을 비교할 수 있음
- 다른 사용자의 결과와 비교하며 협업가능
- MLflow Project
- 머신러닝 프로젝트 코드를 패키징하기 위한 표준
- MLflow Tracking API를 사용하면 MLflow는 프로젝트 버전을 모든 파라미터와 자동으로 로깅
- MLflow Model
- 모델은 모델 파일과 코드로 저장
- 다양한 플랫폼에 배포할 수 있는 여러 도구 제공
- API를 사용하면 자동으로 해당 프로젝트 내용을 사용
- MLflow Registry
- 전체 Lifecycle에서 사용할 수 있는 중앙 모델 저장소
간단한 MLflow 작업 해보기
MLflow project setting
1
mlflow experiments create --experiment-name [project name]
mlflow명령어를 통해 프로젝트를 생성하면 작업 폴더에 Default 프로젝트와 함께mlruns폴더에 프로젝트가 생성됨
Machine Learning Code & MLProject
1
2
3
4
5
6
7
8
9
10
11
12
13
14
15
16
17
18
19
20
21
22
23
24
25
# train.py

import numpy as np
from sklearn.linear_model import LogisticRegression

import mlflow
import mlflow.sklearn

if __name__ == "__main__":
	X = np.array([-2, -1, 0, 1, 2, 1]).reshape(-1, 1)
	y = np.array([0, 0, 1, 1, 1, 0])

	penalty = "elasticnet"
	l1_ratio = 0.1
	lr = LogisticRegression(penalty=penalty, l1_ratio=l1_ratio, solver="saga")

	lr.fit(X, y)

	score = lr.score(X, y)
	print("Score: %s" % score)

	mlflow.log_param("penalty", penalty)
	mlflow.log_param("l1_ratio", 0.1)
	mlflow.log_metric("score", score)
	mlflow.sklearn.log_model(lr, "model")
- 간단한 머신러닝 코드를 작성하고
MLProject파일과 반드시 같은 폴더에 있어야함
1
2
3
4
5
name: tutorial

entry_points:
  main:
    command: "python train.py"
MLProject파일에 위와 같이 적어준다. 이때 탭키로 구분하면 에러가 나는 것으로 보인다. 정확히 character ‘\t’ token 에러가난다.- 스페이스바 2칸을 indentation으로 맞춰주자…
MLflow Tracking
1
mlflow run logistic_regression --experiment-name [project name] --no-conda
- 코드를 실행하면 MLProject가 위치한 곳에서 코드가 수행됨
1
mlflow ui
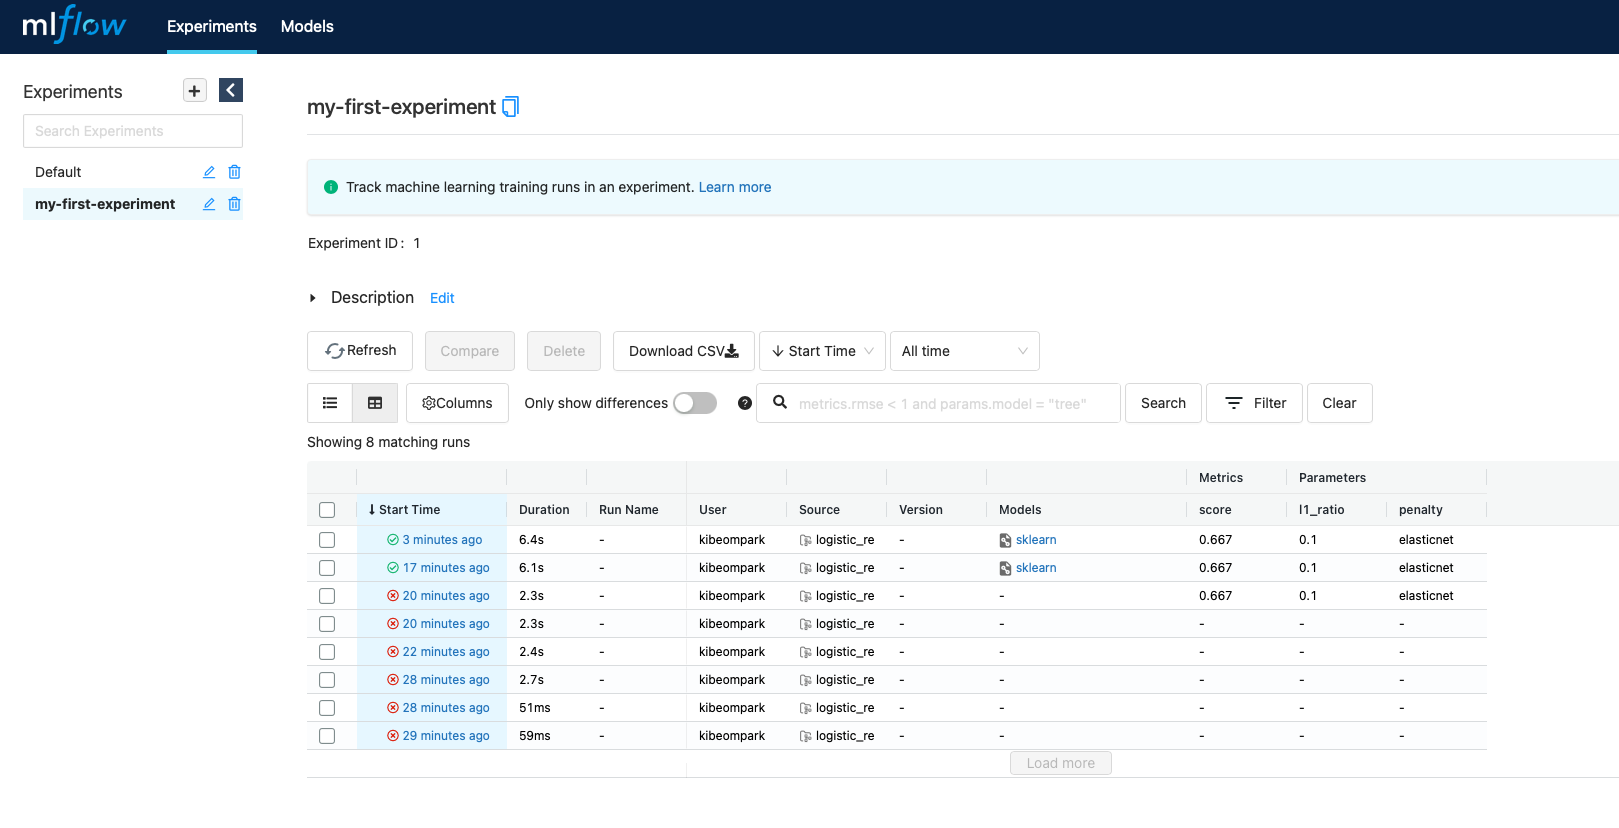
ui로 실행하면 localhost:5000으로 수행됨

- 자신이 설정한 프로젝트 이름으로 들어가면 모델의 수행 결과가 기록됨
MLflow autolog
1
2
3
4
5
6
7
8
9
10
11
12
13
14
15
16
17
18
19
20
21
22
23
# train.py

import numpy as np
from sklearn.linear_model import LogisticRegression

import mlflow
import mlflow.sklearn

if __name__ == "__main__":
	mlflow.sklearn.autolog()

	X = np.array([-2, -1, 0, 1, 2, 1]).reshape(-1, 1)
	y = np.array([0, 0, 1, 1, 1, 0])

	penalty = "elasticnet"
	l1_ratio = 0.1
	lr = LogisticRegression(penalty=penalty, l1_ratio=l1_ratio, solver="saga")

	with mlflow.start_run() as run:
		lr.fit(X, y)

	score = lr.score(X, y)
	print("Score: %s" % score)
autolog를 활용하면 파라미터를 명시하지 않아도 활용이 가능- 단, 모든 프레임워크가 가능한 것은 아님
- PyTorch는 지원하지 않지만 PyTorch Lightning은 지원
MLProject파일에 파라미터를 세팅해주면 파라미터 튜닝도 가능함

Comments powered by Disqus.